Last year around October, FTDI, the manufacturer of the popular USB to Serial converter used by many Arduinos released a driver (2.11.0 and 2.12.0) that bricks chips that it believes to be counterfeit. What it did was to set the PID (Product ID) to 0000 instead of 6001 which renders the chip unusable as Windows cannot find a driver for it. However, there seems to be a fix created by the maker community out there and so today we will be seeing on how to do it. I was given an Arduino Nano by my classmate but when I got it I could not program it. I then checked the PID at the device manager and it was showing 0000.
(This tutorial is largely based on Rei-labs.net tutorial here, but I decided to do my own version)
First thing to do is to uninstall the drivers. You can do this by going to device manager > Ports (COM & LPT) > FT232R USB UART. Right click and select Uninstall. Tick Delete the drivers software for this device and click OK.
Now go to C:\Windows\System32\DriverStore\FileRepository and delete anything that starts with FTDI (ftdibus and ftdiport)

Now its time to install an older version of the FTDI drivers. Go to this website here and scroll all the way down. Download the 2.08.30 version of the drivers and depending on your computer’s OS, download the WIndows 8.1 if you have windows 8.1 or the Windows**** for all other versions.
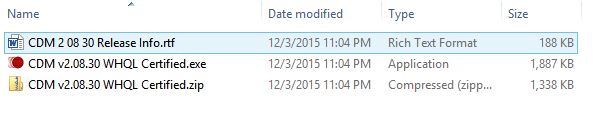
Extract the folders and double click on the exe file. Click next and accept all the license terms. Once done, restart your computer. Do not plug in your FTDI device yet.
Now go back to the C:\Windows\System32\DriverStore\FileRepository folder and open ftdibus.inf. Open the ftdibus.inf file using any text editor. (Notepad will do)
First change the version of the driver. Find this line “DriverVer=07/12/2013,2.08.30” and change it to “DriverVer=07/12/2023,12.08.30“ ,without quotes. This is to fool Windows that this is the newest driver
Next go to [FTDIHw] and add this line just below it.
%USB\VID_0403&PID_0000.DeviceDesc%=FtdiBus.NT,USB\VID_0403&PID_0000
Next go to [FTDIHw.NTamd64] and add this line just below it.
%USB\VID_0403&PID_0000.DeviceDesc%=FtdiBus.NTamd64,USB\VID_0403&PID_0000
Next go to [Strings] and add this line below DriversDisk=”FTDI USB Drivers Disk”
USB\VID_0403&PID_0000.DeviceDesc=”USB Serial Port 0000″
Save the file to desktop and then move it back to the original folder that you opened it.
Now open ftdiport.inf. Basically we are doing the same thing as above, but slightly different
Find this line “DriverVer=07/12/2013,2.08.30” and change it to “DriverVer=07/12/2023,12.08.30” ,without quotes.
Go to [FtdiHw] and add this line just below [FtdiHw]
%VID_0403&PID_0000.DeviceDesc%=FtdiPort.NT,FTDIBUS\COMPORT&VID_0403&PID_0000
Now go to [FTDIHw.NTamd64] and add this line just below [FTDIHw.NTamd64]
%VID_0403&PID_0000.DeviceDesc%=FtdiPort.NTamd64,FTDIBUS\COMPORT&VID_0403&PID_0000
Now go to [Strings] and add this line just below PortsClassName = “Ports (COM & LPT)”
VID_0403&PID_0000.DeviceDesc=”USB Serial Port 0000″
Save the file to desktop and then move it back to the original folder that you opened it.
Although a restart is recommended, it seems to work for me without a restart. Now you can plug in your FTDI device and Windows will automatically install the drives. If not, go to device manager and click on Ports (COM& LPT) and right click “FT232R USB UART” and select update driver software. Select Browse my computer for driver software paste the line below as the location. Then click next. Windows should automatically find it and install it.
C:\Windows\System32\DriverStore\FileRepository
Once done, you should see “USB Serial Port 0000 (COMx). Your device can now be used, but the PID is still 0000. You can even try uploading a blink sketch if your FTDI device is an arduino . However, if you plug in your device to other computers, it will still not work. The next step is to change the PID back to default using FT_Prog
Download the software here or go to http://www.ftdichip.com/Support/Utilities.htm and scroll to FT_Prog and download the “Previous Version”
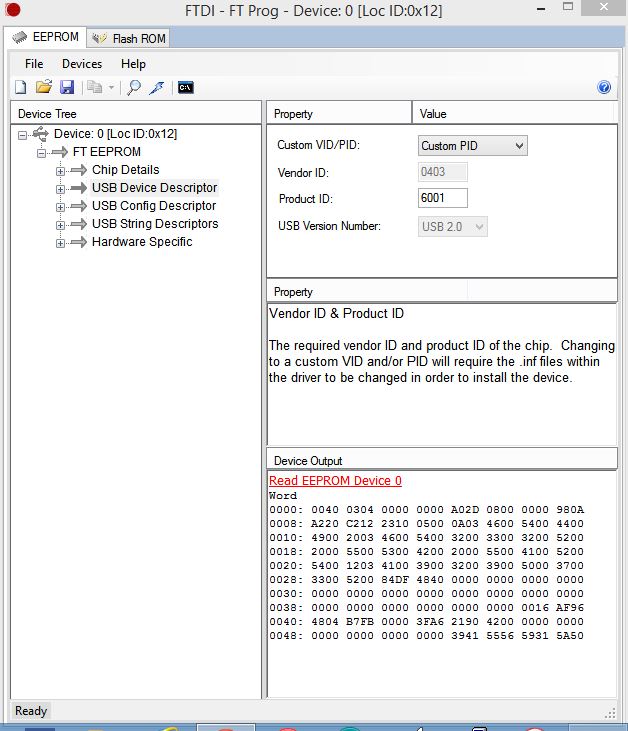
Once installed, launch the program and click on the magnifying glass. Then go to “USB Device Descriptor” on the left. Go to Custom VID/PID and select FTDI default. It should set the Vendor ID to 0403 and the Product ID to 6001. Or you can select Custom PID and set the Product ID to 6001.

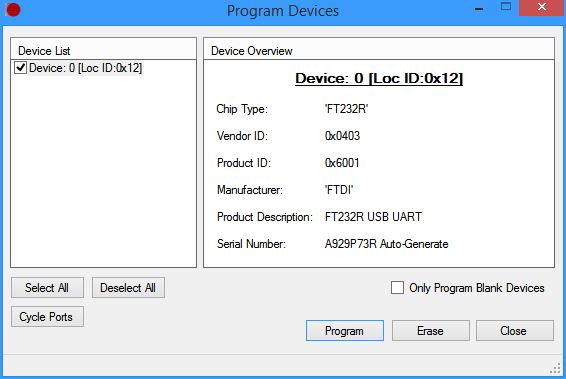
Once done, click on the lightning icon. Double check that the Product ID is correct and then click on program. It should only take a few seconds. Then click close.
Then unplug and plug in your device. Go to device manager and your device should not appear as USB Serial Port 0000. That means you’ve done everything correctly!
If you have any problems and/or questions, feel free to comment below 🙂

Please let me know if you’re looking for a author for your site. You have some really good posts and I think I would be a good asset. If you ever want to take some of the load off, I’d love to write some articles for your blog in exchange for a link back to mine. Please blast me an e-mail if interested. Regards!|
LikeLike
First of all I would like to say superb blog! I had a quick question in which I’d like to ask if you do not mind. I was interested to find out how you center yourself and clear your thoughts before writing. I’ve had a difficult time clearing my thoughts in getting my ideas out there. I do enjoy writing but it just seems like the first 10 to 15 minutes are wasted simply just trying to figure out how to begin. Any ideas or hints? Appreciate it!|
LikeLike
FTDI should have offered free replacement chips to anyone affected!!!!!!!!
LikeLike
I don’t think its their responsibility to replace them. We’re buying counterfeit chips. Real chips wouldn’t be affected. At the same time I also disagree to their action of mass-bricking of counterfeit chips
LikeLike
Hola… estoy buscando solucionar un problema al intentar modificar la eeprom con el FT PROG O MPROG… hago el proceso de programar (rayo) y ejecuta pero al volver a cargar el ftdi232 me aparece nuevamente como estaba originalmente… que estaria sucediendo???? gracias
LikeLike
parece un chip falso
LikeLike
Gracias por responder, pero si fuera falso en mi windows 10 debería bloquearse teniendo el último drivers instalado por lo que he leído…
LikeLike
Hello,
For those who have the FT232RL chip with the different VID (not the PID), and FT_Prog can not find the device because it is a different VID and the original driver can not be loaded (it’s no use searching in English, this tip was hard to find : use the edited ftdibus.inf, not ftdiport.inf):
1- Download the FTDI, D2XX Drivers, (or use another one that works, choose 32 bit or 64 bit correctly), extract and delete the files: ftdiport.cat, ftdiport.inf, ftdibus.cat (if it has)
2- Open the file ftdibus.inf with the text editor (notepad / notepad) and edit (or add) a line with the VID and PID that appears for the chip in the ‘Device Manager’, for each of the 3 following parts (example: FTDIBUS \ COMPORT & VID_1AB2 & PID_002A – VID: 1AB2 & PID: 002A)
[FtdiHw],
% USB \ VID_0403 & PID_0000.DeviceDesc% = FtdiBus.NT, USB \ VID_0403 & PID_0000
% USB \ VID_1AB2 & PID_002A.DeviceDesc% = FtdiBus.NT, USB \ VID_1AB2 & PID_002A
[FtdiHw.NTamd64],
% USB \ VID_0403 & PID_0000.DeviceDesc% = FtdiBus.NTamd64, USB \ VID_0403 & PID_0000
% USB \ VID_1AB2 & PID_002A.DeviceDesc% = FtdiBus.NTamd64, USB \ VID_1AB2 & PID_002A
[Strings],
USB \ VID_0403 & PID_0000.DeviceDesc = “USB Serial Converter”
USB \ VID_1AB2 & PID_002A.DeviceDesc = “USB Serial Converter bad”
In the [Strings] part, leave a name easier to identify (the default is USB Serial Converter, in the example: “USB Serial Converter bad”)
4- Save the edited file.
5- Turn off the signed Windows driver request (you will have to restart your computer if you do not know how to do this, search for videos with the ‘disable driver signing enforcement’ keywords)
6- Manually install the driver, indicating the file that was edited (ftdibus.inf) should appear other options, among them the one that was customized (“USB Serial Converter bad”).
7- If the driver has been installed correctly, it should appear to be an FTDI driver, it should now be accessible to the FT_Prog and the default VID and PID (VID_0403 & PID_6001) must be rewritten / restored.
LikeLike
(Ops: “it’s no use searching in English” Sorry, translated from another language)
LikeLike
Thank you for sharing your solutions with us! 😊
LikeLike
This tutorial should work on ft2232d chip?
LikeLike
I’m not too sure but you can try 🙂 Should be the same steps as well
LikeLike
Thank you very much!! It worked on Windows 7 x64. I had to change the permissions on the INF files so Windows let me overwrite them.
LikeLike
Thanks a lot!
LikeLiked by 1 person
It would be great to have a self-executing program that could perform all of this.
LikeLike
It appears that there was never a follow-up post written to address what to do if the vendorID was changed and you can no longer install the driver to change it back.
I tried editing the .inf file to reflect the vendorID I had changed my FTDI chip to but then, attempting to install the driver produces an “Access is denied” error.
Did you ever post a follow-up? Any brief solution that you could share?
Thanks.
FYI: My Arduino Nano was bricked with the new driver. I used the PROG utility from FTDI to change the productID to 6001, but that did not help. I later realized that it was because I was still using the new driver, but too late. I had already changed the VendorID to 0401 from 0403 from some bogus blog post (not yours). Now the PROG utility cannot find the nano (no driver installed). The nano appears to be permanently bricked now, yet I am still searching for a solution. The Microsoft “usbview” tool does find the nano with VID=0401, but I cannot find a way to change it back yet
LikeLike
I finally figured things out. In order to install the driver with the modified *.inf files, two additional actions are required:
1. Delete the *.cat files from the driver
2. Disable Digital Signature Verification
This link shows how:
http://www.howtogeek.com/167723/how-to-disable-driver-signature-verification-on-64-bit-windows-8.1-so-that-you-can-install-unsigned-drivers/
I was then able to install the driver with my modified VendorID, use FT_PROG to restore the VendorID, and finally, install the old driver with a 2023 date so that Windows thinks it is the latest.
Success!!! My nano-compatible is once again fully functional!!
Thanks for the information.
internetofhomethings.com
LikeLike
Thanks for sharing your solution!
And thanks for linking my blog to your website!
Hassanul
LikeLike
THANK YOU VERY MUCH. You helped me with Galletto ECU programmer. (China clone)
LikeLike