P.E.T : Personal Easy Transporter
Project Supervisor: Teo Shin Jen (http://shin-ajaran.blogspot.sg)
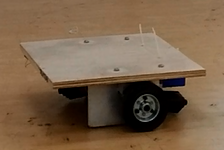
The P.E.T is an open source personal urban transporter, designed to be used for commuting on sidewalks and for connecting the last mile between the MRT Train Station to home. It has a small size which makes it suitable being brought into MRT trains. The benefit of it is that: It is cheap, easy to build, highly adaptable to any spare parts the end user has, small footprint, and relatively acceptable travelling speed.
What its made of
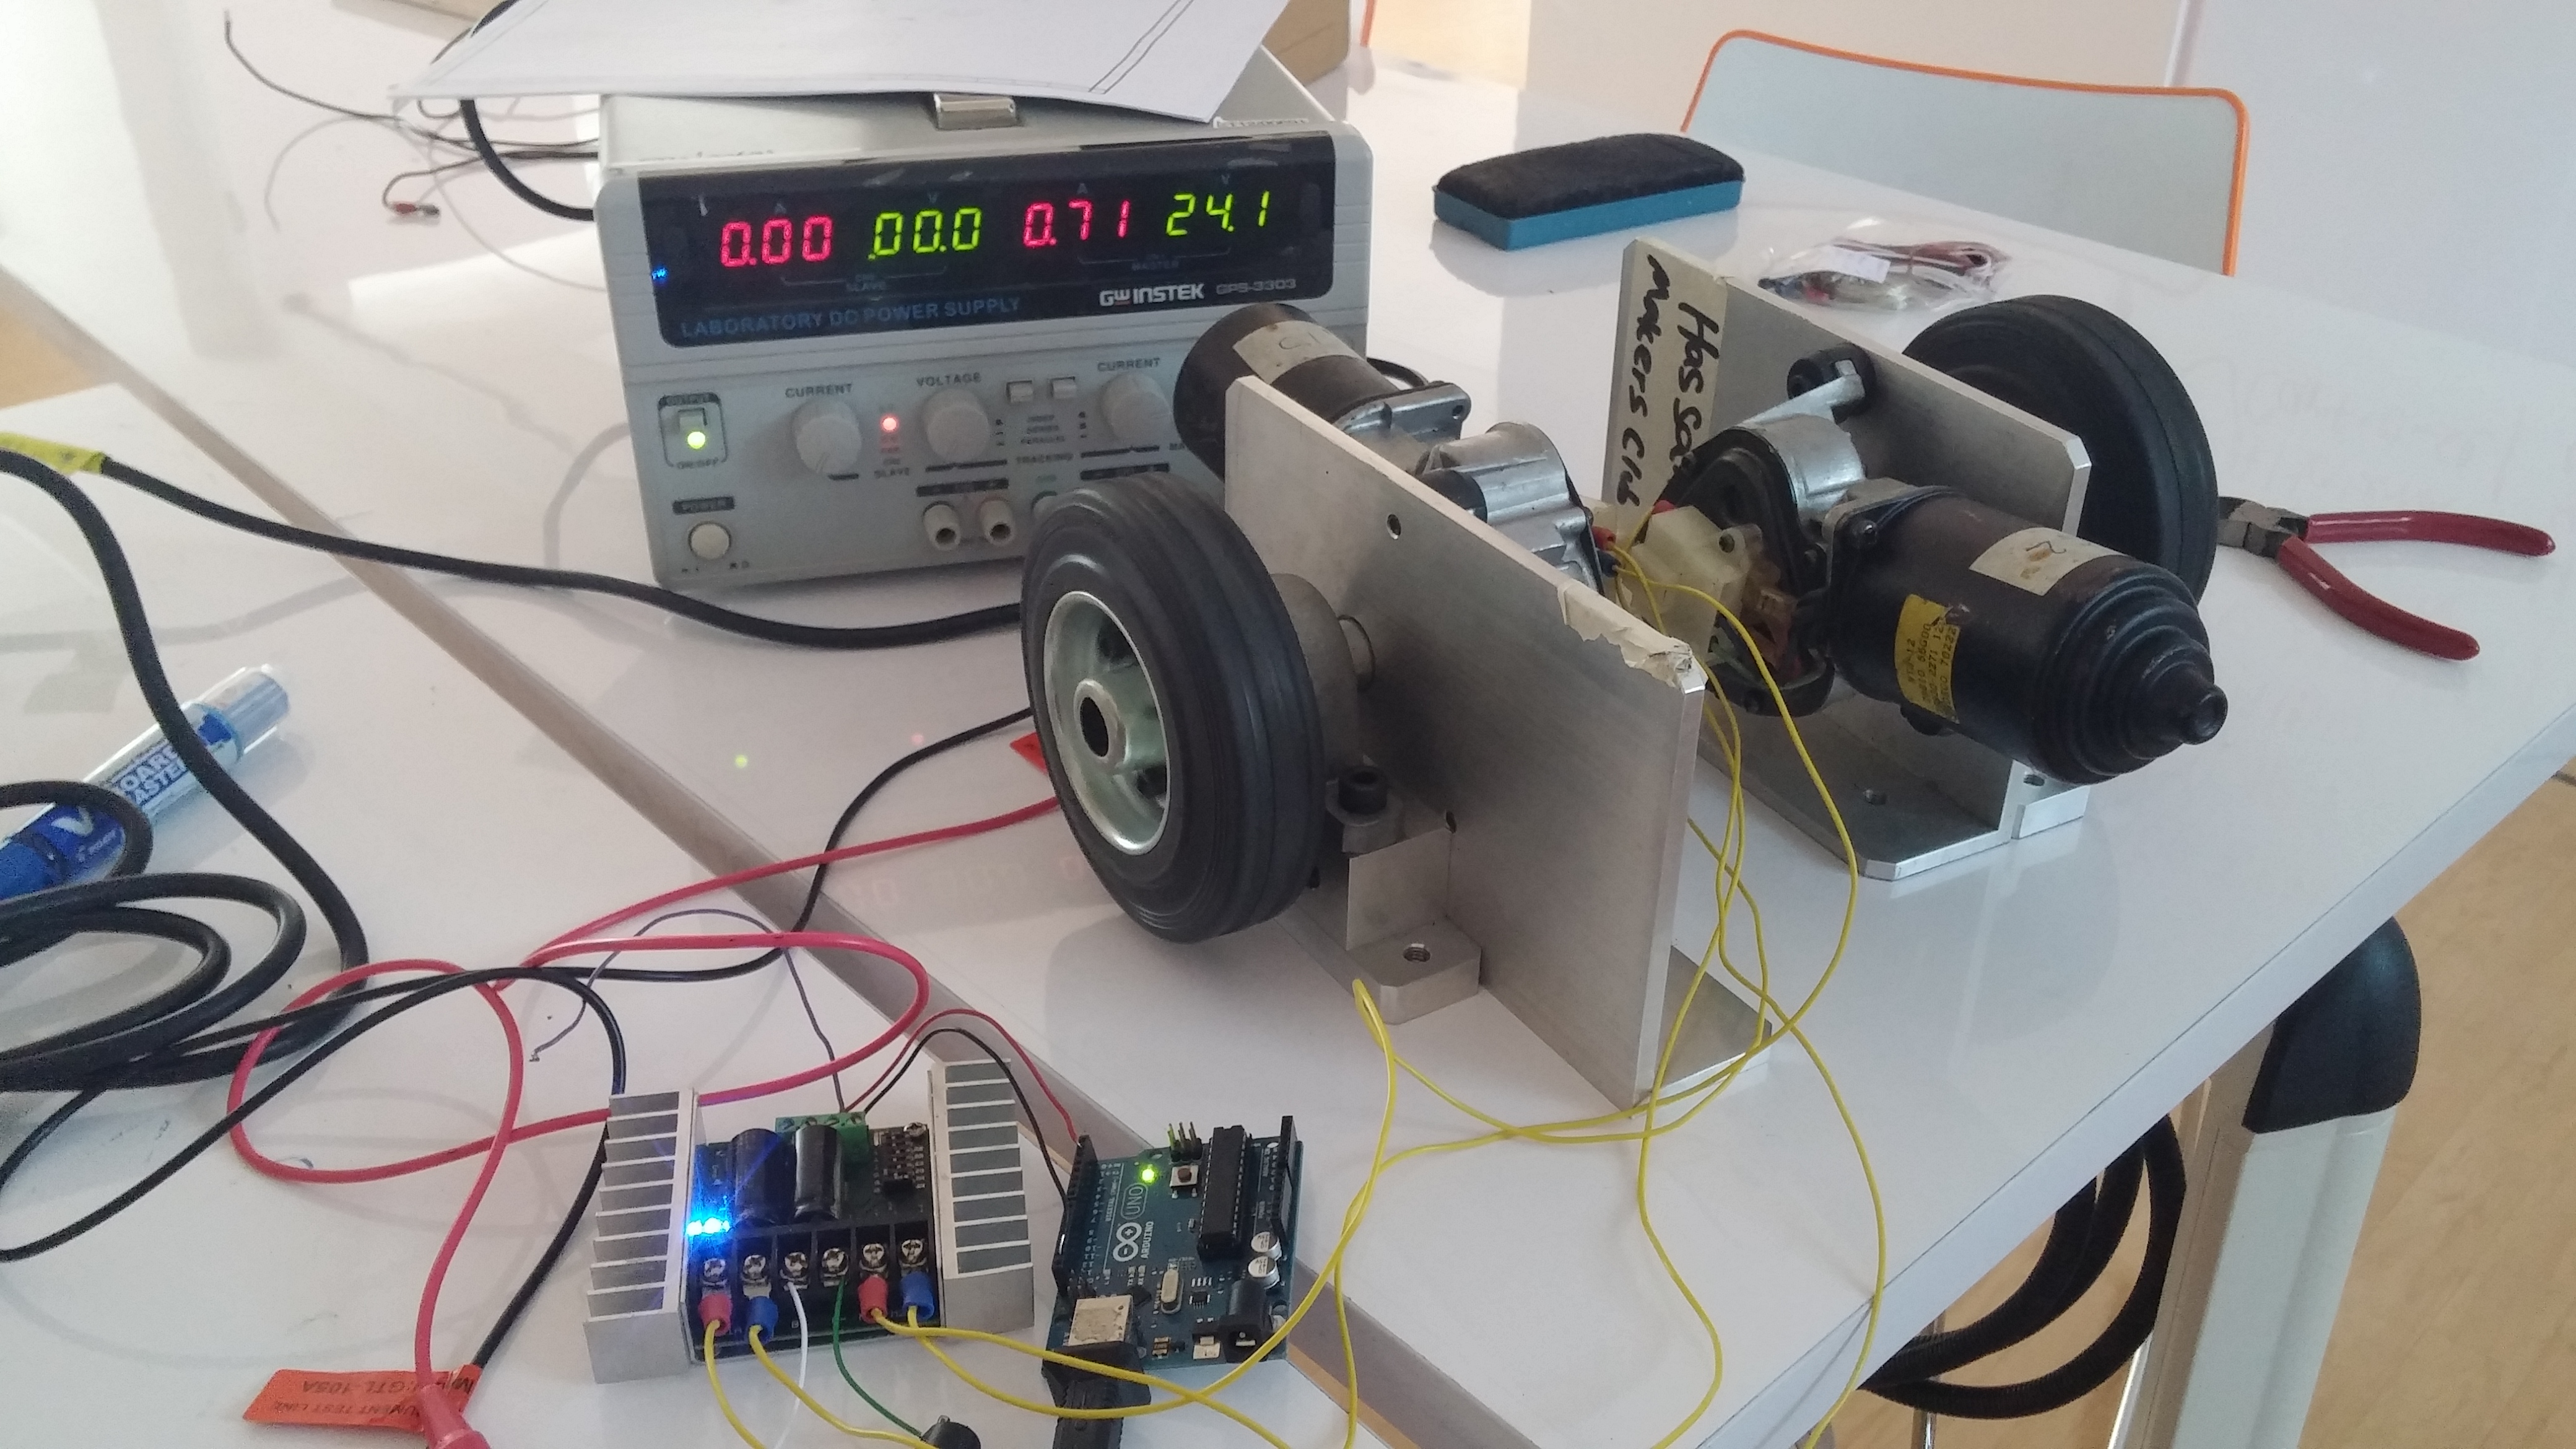
It is made of a pair of repurposed car wiper motors from a previous project, bolted to a piece of 40 x 45 cm plywood. An Arduino Uno receiving commands from an app on an Android Smartphone through the HC-06 Bluetooth module is the brain of the whole transporter. It also gives commands to the Sabertooth Motor Controller through Serial UART. The app is readily available on the Google Play Store here. The P.E.T is powered by a rechargeable 24V LiFePO4/NiMH battery also recycled from a previous project.
How its made
The first thing to do is to test out everything first. The arduino is connected to a breadboard which has the HC-06 Bluetooth module and to the sabertooth motor driver with 24V powering the motor driver. Solder/Crimp fork and push on connectors for easy disconnecting/connecting of the motors. Remember to use sufficiently thick wires. The program for the arduino can be downloaded here.
Motor Driver Vin -> + 24V
Motor Driver Ground -> Arduino Ground and Power Supply/Battery Ground
Arduino Pin 1 -> Motor Driver S1
Arduino Pin 2 and 3 -> Bluetooth Tx and Rx to Arduino
5V and Ground -> Bluetooth Vcc and Ground

The second thing to do is to think of the layout, how everything is mounted to the plywood. Then measure the total size. I chose the wheels to be flush/’hidden’ within the plywood so as not to hit other surrounding things easily.

The third thing to do is to cut the plywood to size. I had it cut to 40 X 45 cm. Using an automatic jigsaw, it was cut from a larger piece of plywood. Then, draw guide lines for drilling the mounting holes. Before drilling, make sure that the mounting holes align with the markings. Double check! Using a hand drill, with a piece of scrap wood underneath, drill the holes needed. I used a 6mm drill bit as the bolts used are M6, giving it a tight fit.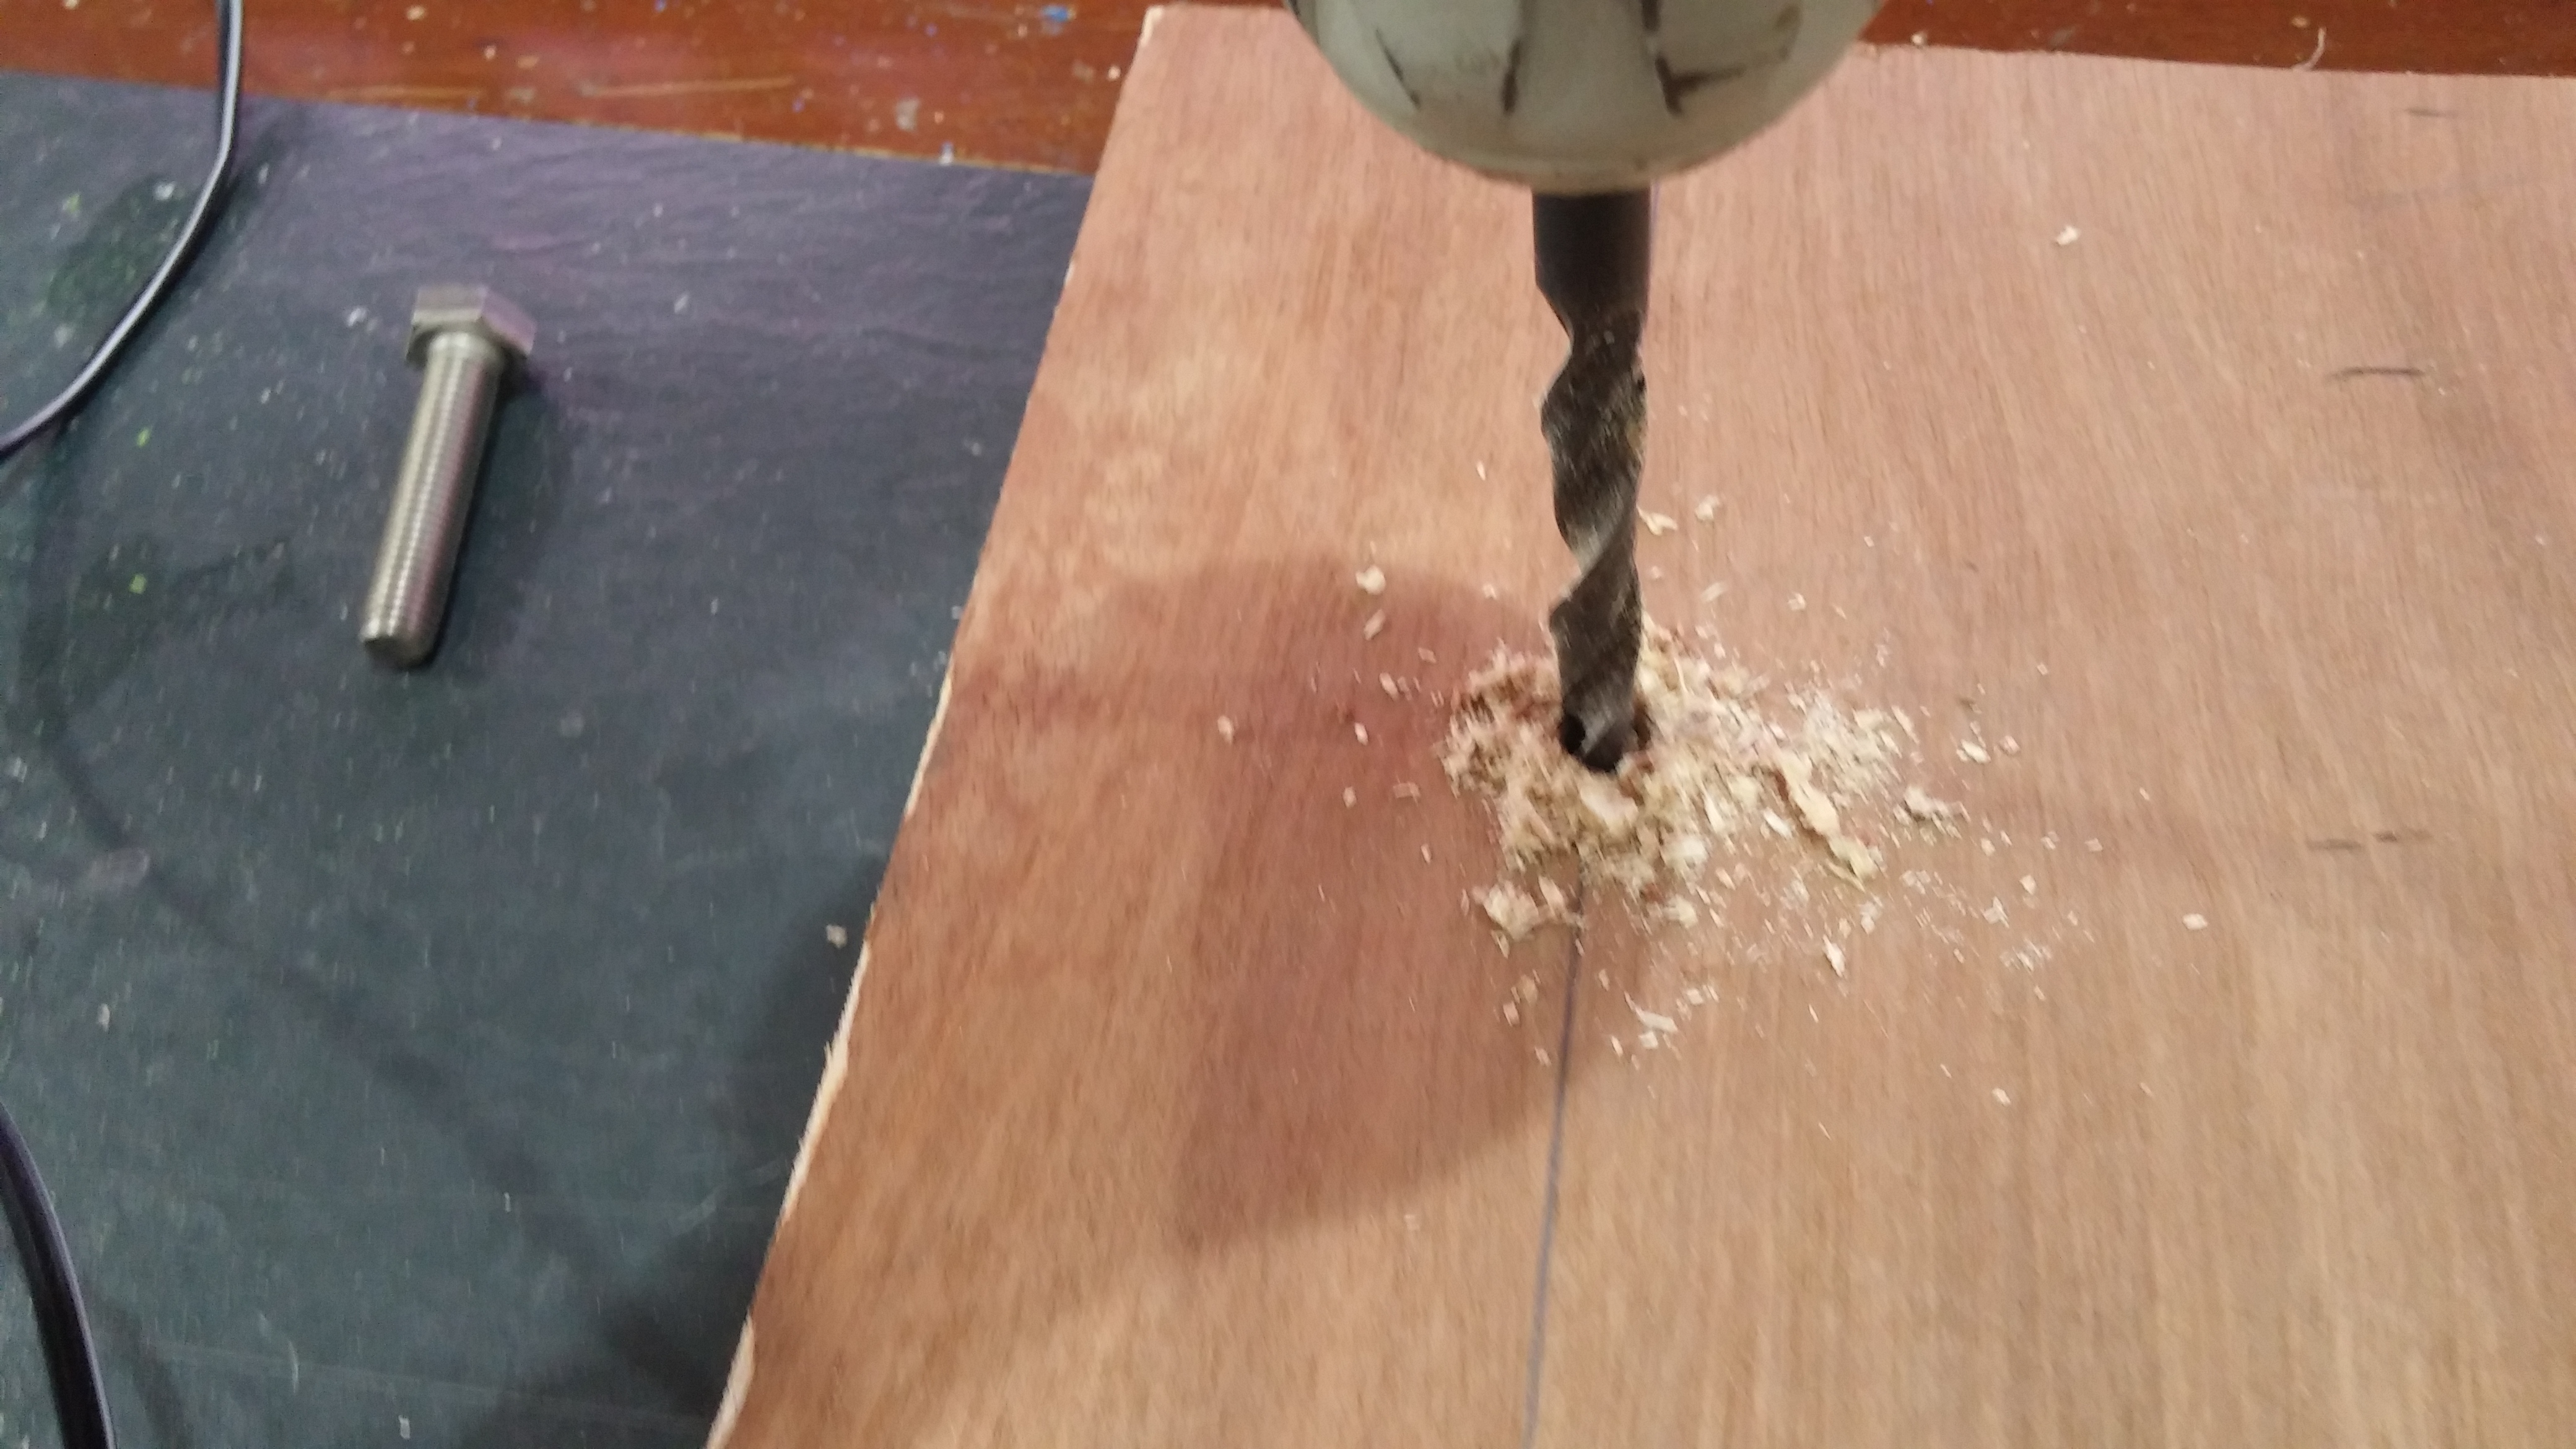 Next, using the appropriate screw size, screw in the motor to the plywood. As the screw head has a hexagonal shape, use a spanner to tighten it. Insert a nut to the other end, if available.
 The fourth step is to drill holes for the battery, Arduino and the Sabertooth motor driver. This should be fairly simple. Use self tapping screws for this as these screws do not go fully go through the wood.
 The last step is to fasten the battery to the plywood, connect the respective motors to the respective ports on the motor driver. Remember, one of the motors has to have its polarity reversed. Test the forward direction first to see which motor has to have its polarity reversed. If you don’t have the correct connector for the battery, use crocodile clips. Add a switch between the battery to the motor driver input. As the motor driver has a 5V out, use that to power the arduino through the Vin header. Refer to the earlier wiring diagram on top of this post. Solder wires to the Bluetooth module and a connector to the other end. Make sure the wires are all not hanging freely. Use wire fasteners to secure them.
And you’re done! Wasn’t that hard, was it? Now go out there and show the world what you have made!

Me marca un error en el codigo :c
LikeLike